 |
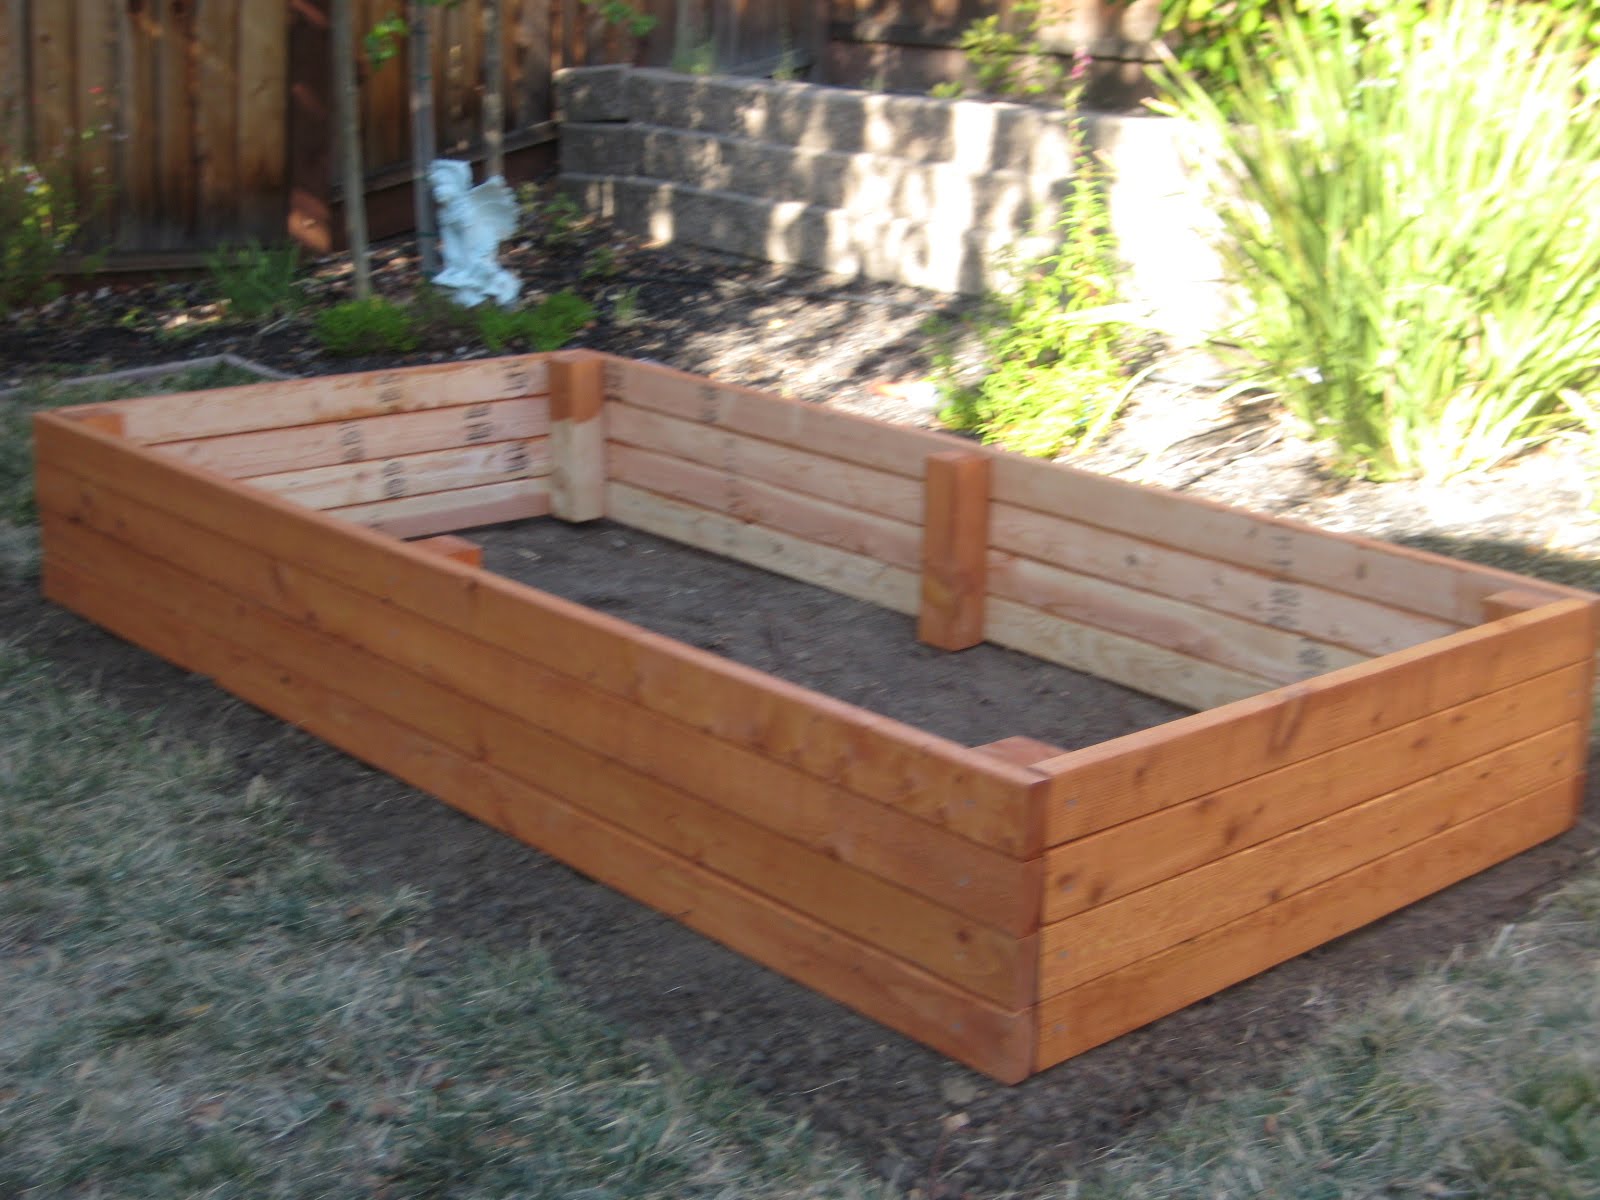
Dimensions: 4ft x 8ft x 14in |
I had a few speed bumps along the way, but for the most part it's a pretty simple process. If you like the look of my garden bed, here is a step-by step guide to building it. (For more details on materials, please refer to my previous post "Building My Garden Bed")
This is going to be pretty long, due to pictures and notes, but I thought it would be best to keep it as one post for easy printing.
Materials needed:
~ Twelve 2x4's (This is to make it 4 tall, if you wish for it to be shorter or taller, adjust accordingly.)
~ One 4x4
~ Exterior wood screws
~ Wood stain for the outside (optional)
~ Electric circular saw (a hand saw will work, it's just more work for you and will take longer)
~ 2 sawhorses
~ Tape measure
~ Electric drill
~ Shovel (if needed)
~ Gloves and safety goggles
Step 1: Cutting Your Pieces

~Cut 4 of your 2x4's in half for the widths. (Be sure to measure and mark your pieces to ensure you are cutting them exactly in half) "Measure twice, cut once!"
~ Measure how long you want your corner and inside pieces to be, then cut your 4x4 in 6 pieces. (mine were 14 inches long, the height of my garden bed)
~ Having someone hold the wood as you cut is a good idea (as shown to the right) to keep your pieces from flying and splintering

~ Stain one side of your 2x4's and the top of your 4x4's (whatever will be visible and not touching your soil) using the instructions on your stain of choice.
~ Place something, like newspaper, under your workplace to catch any drippings.
~ Let wood sit and dry thoroughly
~ This is an optional step and is for aesthetic purposes only.
Step 3: Marking Your Holes

~ Measure and mark where you want to put your screws, this way you know where to drill your holes.
~ I chose to attach my 2x4's directly to my 4x4's, (you can choose to assemble any way that is easiest for you) so I measured to the middle of the 4x4 and made my marks there.
~ Using a nail, or a pencil to mark your spots are easy methods.

Step 4: Drill Your Holes
~ Since you already made your marks, you know exactly where to drill your holes!
~ You want to use a drill bit that is smaller than your screw, that way your screw still has wood to grip.
~ Drilling a hole first can make it easier to get your screw in, and also prevents your wood from splitting.
 Step5: Assemble Your Bed
~ Line up your 2x4's exactly where you want them before you start to screw them to your 4x4, or to each other. (as shown to the right)

~ For me, it was easier to assemple the short sides first, then attach the long boards. (as shown to the left)

~ When you begin to assemple the long sides, make sure that your short sides are standing at a 90 degree angle using a level. (as shown to the right)
~ If they are not at a 90 degree angle, your garden bed will be crooked.
~ Once your box is made, you want to attach your last two 4x4's to the middle of your long sides. (These pieces will keep your 2x4's connected to each other. You can see these pieces in the picture of my completed garden bed)

~ This step can be done at any point.
~ If you chose to place your bed on grass like I have, you first want to outline where your bed will go so you know where you need to dig.(as shown to the left)

~ When digging up the grass, allow a few extra inches all around. This will prevent grass from growing up into the sides of your garden bed, and makes it easier to mow around it.
~ If your ground is uneven or slanted (like mine was) dig out the higher side, and use that dirt on the lower side to even out.
~ If you are worried about weeds coming through, you can lay down landscaping fabric, or a weed shield.
~ Place your finished garden bed inside your plot, and fill with soil!
Now that you are done building your raised garden bed, you can decorate it!

nice one Jen...im inspired to do my own too....ill be moving in to my own house soon...and im so excited to have my own little garden...thanks!
ReplyDeleteThat's wonderful! It is such a fantastic hobby (obsession)! In the beggining everything is trial and error, so just remember "There are no gardening mistakes, only experiments." -- Janet Kilburn Phillips. Happy gardening! =)
ReplyDelete